
Warm bread at home feels special, and the good news is you can do it with ease. If you’re wondering how to make bread at home, just mix flour, water, yeast, and salt, then knead, let it rise, and bake. I still recall my first loaf in a small U.S. kitchen—it was not perfect, but it tasted fresh and real, which builds confidence fast.
I’ve tested this many times, and it works well for beginners, so try it today and see how simple homemade bread can be.
How to Make Bread at Home (Simple, Clear, and Reliable Guide)
Making bread at home is easier than it sounds. I still remember my first loaf—it looked rough, but it tasted amazing. The truth is, once you understand the basics, bread becomes very forgiving. This guide will walk you through it in a clear, simple way so you can succeed on your first try.
When Homemade Bread Works Best
Bread works best in a warm kitchen with accurate measurements and basic tools.
Homemade bread works best when your kitchen is warm and calm. Yeast loves warmth, so your dough rises faster in a cozy space. If your room is cold, the dough may take longer, but it will still work.
This method is perfect if you have a basic oven and simple tools. You don’t need fancy gear to make good bread. I often use just a bowl and my hands, and it turns out great.
When This Method May Fail
Bread can fail if the environment is too cold or if measurements are off. Yeast may not activate well in cold air. This can lead to flat, dense bread.
Another common issue is adding too much flour. It makes the dough stiff and dry. I’ve made that mistake before, and the loaf came out heavy like a brick.
Required Tools & Ingredients
Basic bread needs flour, water, yeast, salt, and simple kitchen tools.
Before you start, gather everything in one place. This helps you stay focused and avoid mistakes during mixing.
| Category | Essential Items | Optional / Alternatives |
|---|---|---|
| Ingredients | Flour, yeast, water, salt | Sugar, oil, milk, butter |
| Tools | Mixing bowl, oven, tray | Stand mixer, thermometer |
You can swap tools if needed. I’ve used a pot instead of a tray before. The result was still good, just a bit different in shape.
Dough Composition & Ratio Logic
Balanced ratios of flour, water, yeast, and salt control texture and rise.
Bread is like a simple science experiment. Each ingredient has a job.
| Ingredient | Role in Bread | Common Mistake |
|---|---|---|
| Flour | Builds structure | Too much → dense bread |
| Water | Hydrates dough | Too little → dry dough |
| Yeast | Makes bread rise | Dead yeast → no rise |
| Salt | Adds flavor, controls rise | Too much → slows yeast |
When I started, I didn’t respect ratios. My dough was either too sticky or too dry. Once I learned balance, everything improved fast.
Step-by-Step Process
Step 1: Activate Yeast
Mix warm water, yeast, and sugar; foam means yeast is active.
Mix warm water with yeast and a little sugar. Wait 5–10 minutes. If it foams, your yeast is alive and ready.
If nothing happens, the yeast is dead. I always test this first to avoid wasting ingredients.
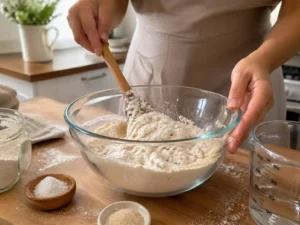
Step 2: Mix Dough
Add flour and salt to the yeast mix. Stir until a sticky dough forms. Adjust slowly with small amounts of flour or water.
The dough should feel soft, not dry. Think of it like soft clay that holds shape.
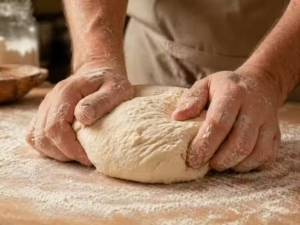
Step 3: Kneading Process
Knead dough for 8–10 minutes until smooth and elastic.
Knead the dough using your hands. Push, fold, and repeat. After about 10 minutes, it becomes smooth and stretchy.
Under-kneading is a common mistake. It leads to weak bread that doesn’t rise well.
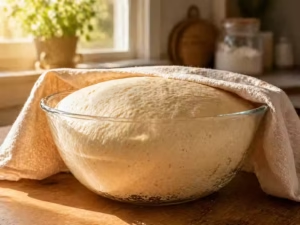
Step 4: First Rise (Proofing)
Place the dough in a bowl and cover it. Let it rest until it doubles in size. This takes about 1–2 hours.
A warm place helps a lot. I sometimes keep it inside the oven with the light on.
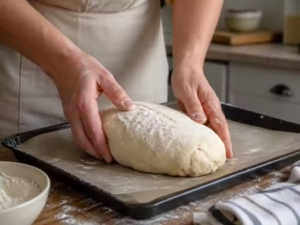
Step 5: Shaping
Punch down the dough gently. Shape it into a loaf or rolls. Don’t overwork it, or it loses air.
This step feels fun. It’s where your bread starts to look real.
Step 6: Second Rise
Let the shaped dough rise again until slightly springy when pressed.
Let the shaped dough rest again for 30–45 minutes. Press it lightly. If it springs back slowly, it’s ready.
Skipping this step can make your bread dense.
Step 7: Baking Phase
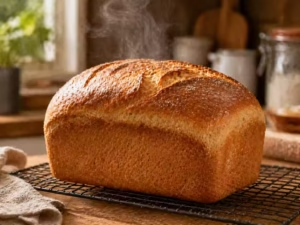
Bake at 190°C (375°F) until golden and hollow when tapped.
Bake the bread until golden brown. Tap the bottom—it should sound hollow.
This is my favorite moment. The smell fills the whole kitchen.
Verification & Success Indicators
Good bread gives clear signs. These help you know you did it right.
| Indicator | Correct Result | Problem Indicator |
|---|---|---|
| Texture | Soft and airy | Dense or gummy |
| Crust | Golden brown | Pale or too hard |
| Sound | Hollow when tapped | Dull sound |
If your bread checks these boxes, you nailed it.
Error Handling & Fixes
Mistakes happen. I’ve had plenty. The good news is they are easy to fix.
- Dough too sticky: add a little flour slowly
- Bread too dense: knead more or let it rise longer
- No rise: check yeast and water temperature
Each mistake teaches you something new.
Safety & Risk Considerations
Keep water warm, not hot. Hot water kills yeast fast. Always test with your finger—it should feel like warm bath water.
Use oven mitts when baking. Burns happen quickly. Also, keep your workspace clean to avoid contamination.
Time, Effort & Skill Level
Bread takes 2–3 hours total, with about 30–40 minutes of active work.
Bread takes time, but not much effort. Most of the time is just spent waiting for it to rise.
| Factor | Estimate |
|---|---|
| Total Time | 2–3 hours |
| Active Time | 30–40 minutes |
| Skill Level | Beginner |
It’s a slow process but very relaxing.
Maintenance & Aftercare
Let bread cool before slicing. Cutting too early makes it gummy inside. I learned this the hard way.
Store it in an airtight container. It stays fresh for 2–3 days. You can also freeze it for longer use.
Practical Usage Scenario
Homemade bread is great for weekly baking. It saves money and avoids preservatives.
You can also adjust ingredients for your needs. I sometimes add milk for softness or whole wheat for health.
Performance & Real-World Behavior
Bread dough changes with the weather and flour type. Some days it feels perfect; other days it’s tricky. That’s normal.
Your first loaf may not look perfect. Mine didn’t. But with practice, it gets better fast.
Over-proofing in hot weather can collapse dough. Fast baking without proper rise leads to dense bread. Control and patience are key.
Final Thoughts
Learning how to make bread at home is a skill worth having. It’s simple, cost-effective, and deeply satisfying.
The first loaf might not be perfect—and that’s okay. Each attempt teaches you something new. Stick with it, and soon you’ll bake bread that feels and tastes just right.
FAQs
What is the easiest way for beginners to learn how to make bread at home?
Start with flour, water, yeast, and salt. Mix, knead, let it rise, and then bake. This simple method builds skill fast and helps you learn how dough should feel.
How long does it take to make bread at home?
It takes about 2–3 hours total. Active work is only 30–40 minutes. Most of the time goes into rising, which helps develop soft texture and better flavor.
Why is my homemade bread dense instead of soft?
Dense bread often means under-kneading or a short rise time. Let the dough double in size and knead well. This helps build air pockets for a light, soft loaf.
How do I know if my yeast is still active?
Mix yeast with warm water and a bit of sugar. If it foams in 5–10 minutes, it is active. No foam means the yeast is dead and should be replaced.
Can I make bread at home without special tools?
Yes, you can use a bowl and your hands. An oven is enough for baking. Tools like mixers help, but simple methods still give good results at home.